Showing posts with label Crafting. Show all posts

Thursday, December 20, 2012

12/20/12 My Caged Raven Line

My Fashion Illustration Final: 
Inspiration Board:
 Customer Board:

There was a lot of blood, from the chicken wire turned barbed wire, sweat, from running around trying to find all the stuff I needed, and no sleep for two entire days... Let's just say I started to not be able to function. But trust me, it was so worth it. I love this baby. <3 I hope to make it into an actual line one day. Whelp! Another thing for the portfolio!~
And now.... WINTER BREAK!
Now that all of this shenanigans is up. I have a lot of posts to catch up on! ;)


Thursday, August 9, 2012

8/9/12 DIY Nebula/Galaxy Shirt

To make this...
You will need:
Optional: Sponge or paper towel and thin paint brush.
1. Lay the trash bag within the shirt so the bleach or paint does not seep through to the back.
2. Pour bleach into the spray bottle diluted with water.
 3. Spray from a distance with the bleach bottle and twist the shirt to create spiral galaxies.
 4. Let bleach dry. (You can wash the shirt of the bleach after it drys).
5. Prep acrylic or fabric paint.
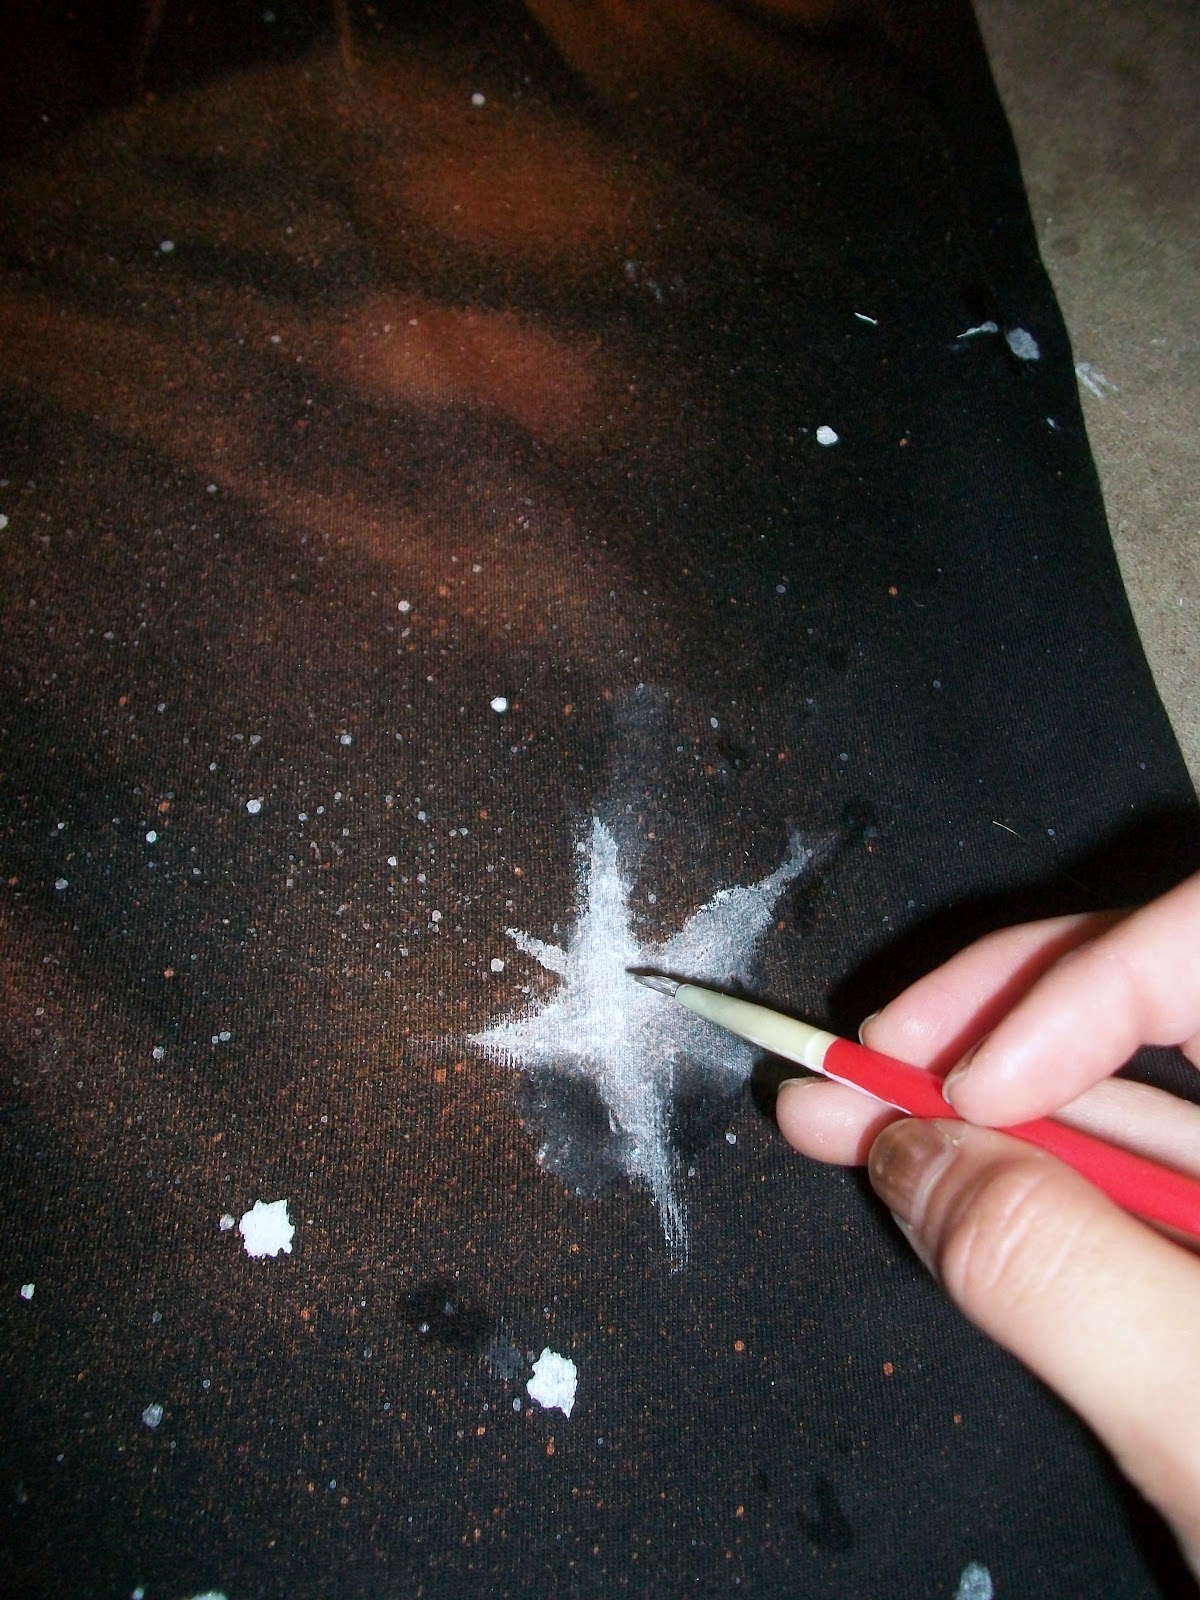
 6. With the tooth brush, wet with desired paint color and flick bristles to get paint splatters on shirt.
7. Paint star patterns over shirt. In the right picture I made a mistake so I made it into a star haha.
 8. Damp sponge or paper towel with paint and water and dab over shirt for effect.
 9. Let dry.
10. Wash by hand and hang dry.
For this shirt, I added a little embroidery of my name on some fabric and sewed it on the bottom. <3


 Happy 19th Birthday Keith!
Enjoy your shirt. ^-^

Thursday, March 29, 2012

3/29/12 DIY Stone Rings


After school today, I was excited to go to the hardware store ASAP to gather some items to make some jewelry. To make these rings I retrieved stainless steel wire, a piece of amethyst(purple stone) or a look alike stone bead(blue bead), and needle nose pliers. I simply used the pliers to form the steel wire around the stone in the design I liked and made it loop for my finger to go through. It was simple and fast and they look great!
I've also made some geometric necklaces I cannot wait to post pictures of!
<3

Monday, March 5, 2012

3/5/12 World Dyed in Pink


 Blowing a kiss to my boyfriend.


This weekend I dyed my world in pink with Petal Pink RIT Fabric dye. At first I was aiming to have completely pink shorts but I didn't realize until I was dyeing my shorts there was going to be some blue in them. But that's okay! I love my dyed pink shorts. First I had to find an old pair of jeans I never wore then I cut the legs to the length I wanted and rolled them up. During the dying process I was happy that the stirring caused the edges of my shorts to fray. I was pleasantly surprised with the results overall. But after just dying one pair of shorts I realized I still have a big old bucket of pinkish red dye. I ran upstairs to grab a plain worn out white tee that wasn't truly white anymore from the wear and dunked it in the dye for less than a minute making sure not to make it too bright a pink. Then I threw both of my items in the dryer and ta-dah a pink wardrobe! I will be doing a DIY on how to get pure colored jeans pretty soon. These shorts were only a little practice run.
<3

Monday, January 2, 2012

1/2/12 DIY Mason Jar Soap Dispenser

 I was inspired by these Mason Jar soap dispensers I came across on Pinterest.
These specific jars are from tickledpinkgoods on etsy. But I find this to be an easy DIY project!
You will need:
  • a Mason Jar
  • an old soap dispenser(or you could buy a pump)
  • Drill
  • small drill bit & large drill bit (or a hole saw)
  • Crop Saw
  • Hot Glue gun
  • Marker
  • Liquid Soap
  • Mark the center of the lid so you know where to drill.
    Take the smaller drill bit to first puncture the lid and make it smoother for the larger drill bit to go through.
It should look like this so far!

 After all that drilling make sure you clean out the jar from any metal shards left behind. Before...
...pouring in your soap!
Next, take your cropping saw and cut off the top of your old soap bottle so you can srew in the pump. If you leave a little hang over from the bottle when sawing off the top, you can skip the next step with the hot glue gun.
Hot glue a few layers on the outer rim of the srew on top so it doesn't fall through the jars lid.

It should look like this with a little lip.
 Place the srew on top in the whole with the lip on the bottom. Stick a little hot glue over any holes poking out for extra security.
Screw in the pump to the lid then screw on the lid to the jar.
 Your Mason Jar soap dispenser is finished!
Now go wash your hands! ;) <3